


Ingestion with Airbyte: A Guided Tutorial


Last week, I wrote about how I have been using Airbyte as an open-source ingestion framework in a larger project focused on data from the Apache Superset community.
In this blog, we will go step by step through the process of setting Airbyte up to ingest data from open-source communities.
Grab an ec-2 system on AWS (or your preferred equivalent) and follow along.
Step 1: Set up docker-compose and Airbyte
There are two ways to deploy Airbyte: the docker-compose stack, and the Kubernetes deployment. Since I don't want to assume a working knowledge of Kubernetes, we will use the docker-compose setup.
First, set up git, docker, and docker-compose. I usually refer to this guide for docker-compose which works wonderfully for EC2 systems running Amazon Linux 2 (which we will use in this tutorial). The official Airbyte documentation also includes detailed instructions for an EC2 instance here.
After docker-compose is up and running (verify with docker-compose version), it's time to set up Airbyte. One of the strongest parts of the Airbyte experience is the amazingly simple setup, which consists of:
git clone https://github.com/airbytehq/airbyte.git
cd airbyte
docker-compose up
I recommend popping into a screen or tmux session before docker-compose up to avoid issues with disconnecting from the remote instance once Airbyte is running.
When the setup completes in a few minutes, Airbyte should be acessible by navigating in a web browser to INSTANCE_IP:8000, where INSTANCE_IP is the IP address of your ec2 instance.
Step 2: Install the source connectors of choice
Now we are almost ready to set up Source connectors for each of our data sources, which for this tutorial are GitHub and Slack.
But first, we need to ensure we have the best connectors installed for those datasources, which in my opinion are the native connectors built by the Airbyte team.
Click the Settings button on the sidebar, then the Sources option. Click the +new connector button.

Then fill out the fields like so:

Note, 'latest' can be replaced with the docker hub tag for the connector version of choice (latest is '0.1.10' at the time of writing).
The Slack connector (Singer-tap based) is already available by default.
Step 3: configure sources
Now that the connectors for Slack and GitHub are installed, it's time to configure our sources. Click the sources tab on the left sidebar, then click the +new source button.

Select the GitHub (Native) source we configured in step 2, then fill out the fields.

Two quick things to note:
- Multiple repositories can be selected by putting a space between each repository path. Instead, I would recommend a single source for each repository, especially if any of the desired repositories are large.
- Multiple GitHub keys can be separated with a comma to rotate between the provided keys when the API rate limit gets hit. This can be a huge time-saver when syncing large repos
On the next screen, you have the option to select any currently configured destination. Select +destination to create a new destination. Where you choose to send the data is up to you. If you have no SQL speaking database to send the data to, you can use the "File" destination to inspect the output.
Step 4: configure the connection
The last step is to configure the connection itself. Choose a schedule, a good prefix for the resulting tables, and the streams to be synced.
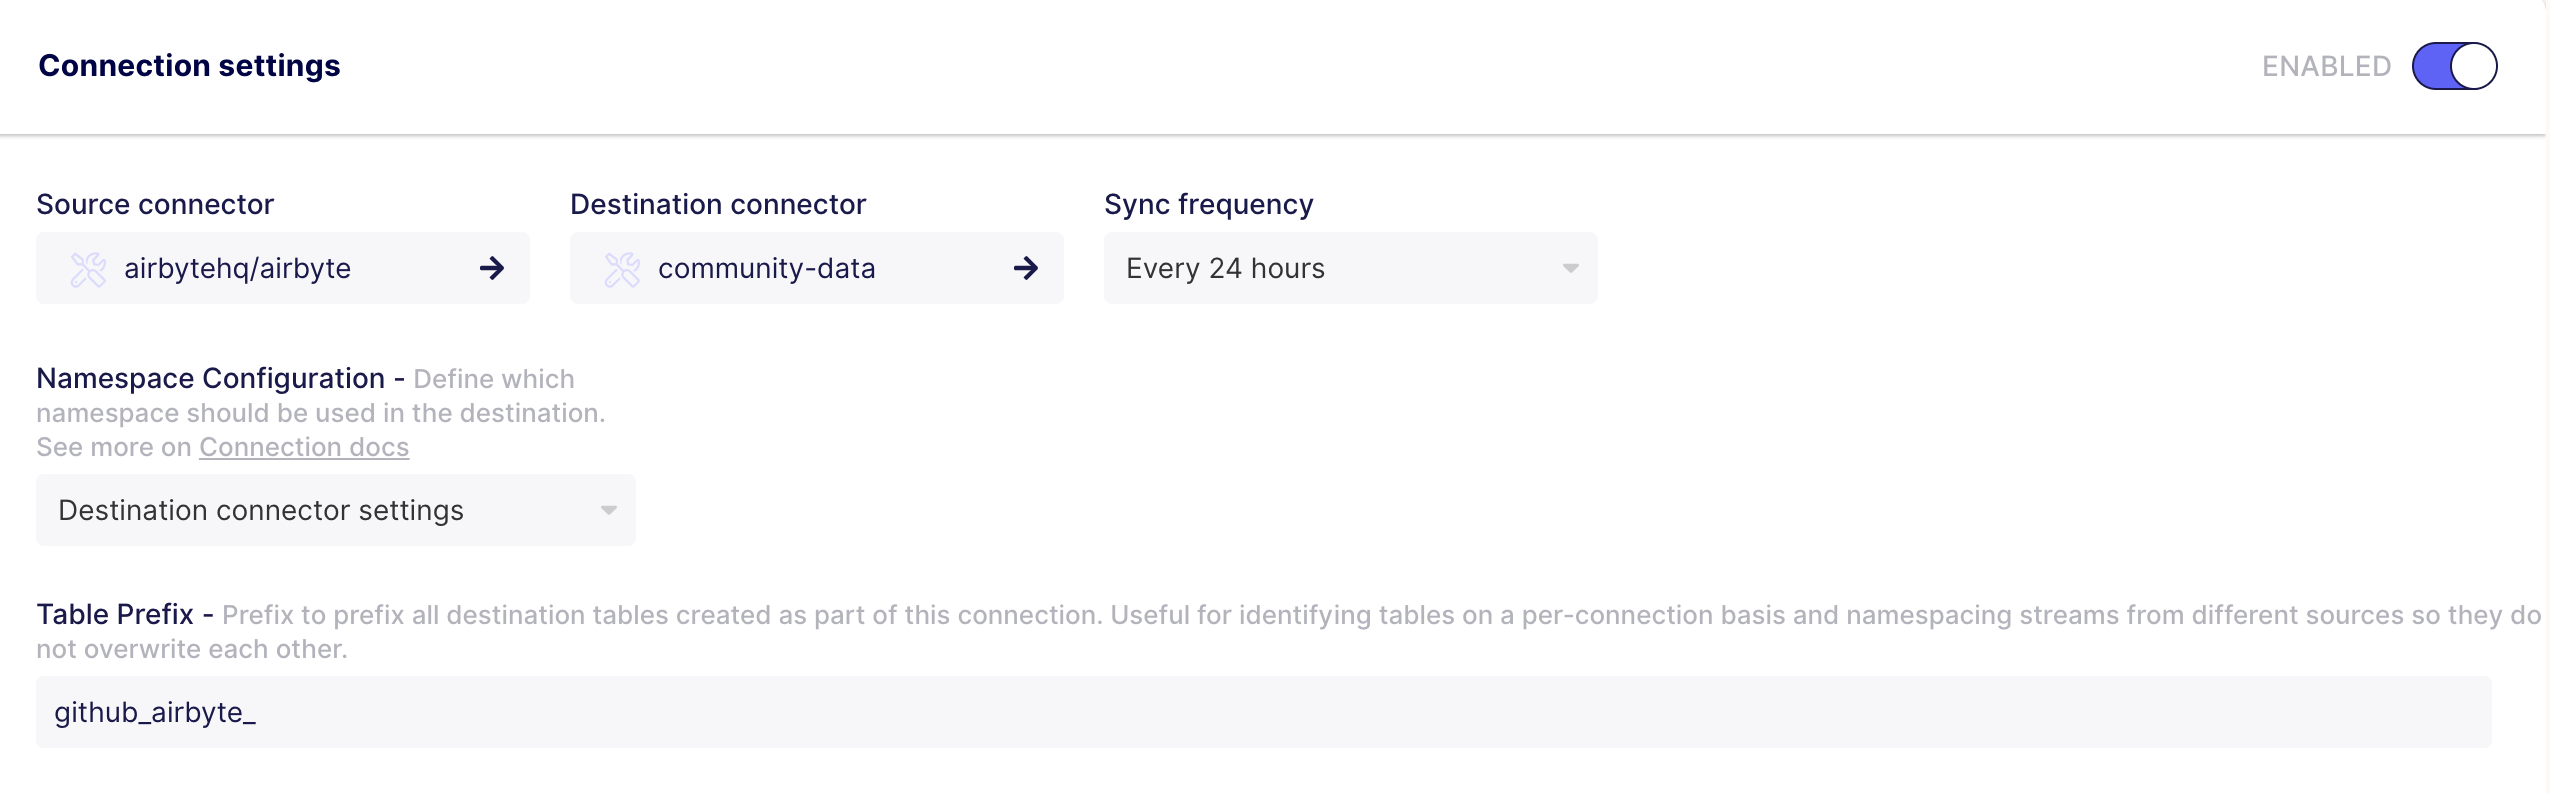

A few decision points here:
- I have my destination configured to deposit the data in a common 'base data' schema, so I choose to use the destination namespace.
- For each stream, there are options
- I choose to carry out all transformations on the base data as a subsequent step, but Airbyte can also carry out the transformations by providing a dbt model for the connection
Configuring connections from Slack is a similar process, and we've outlined it already in a previous blog.
Conclusion
Once the setup and configuration is done, the last thing to do is actually sync the data! In my experience, the Airbyte GitHub connector (v0.1.10) struggles a bit with very large repositories at the time of writing, and similarly the Slack connector struggles with large Slack communities.
The best practices I have found to help fill in the gaps are:
- Use an external orchestrator (like Airflow), or an application that hits the Airbyte API to schedule and trigger the sync jobs. Multiple repos syncing with the same key at the same time is to be avoided.
- For the largest repositories, syncing one stream at a time (or setting up a source for each stream) seems to get around some of the issues.
- Depending on what kind of access your Github API token has, certain streams can be selected in Airbyte, but won't be able to sync (collaborators, teams, users). This is expected.
Next time we will focus on how we transform and validate the data to create a suitable data model for BI and analytic uses.
